Your storefront window is the first image that our shoppers, and YOUR potential customers, are going to see about you. Click on the video play button below for a quick video tutorial, or you can scroll down to view simple screenshots and written instructions.
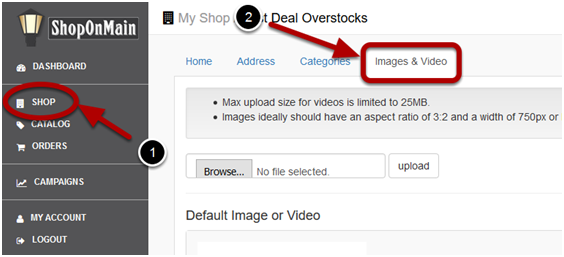
Click on Shop
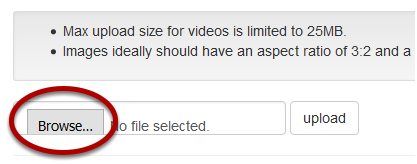
Then click on Image & Video.
Click on Browse
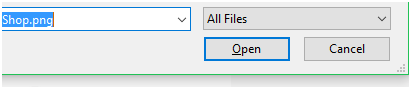
Select File
Once you’ve found the appropriate image file you have saved on the device your using, click on Open.
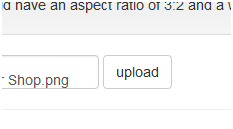
Upload
After opening your image file, click on Upload.
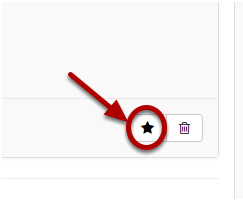
Change Default or Remove
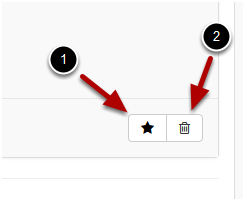
You can select a new default storefront image by selecting the star icon on any additional images you’ve uploaded. You can also delete an image by clicking on the trashcan icon.
Click on the video play button below for a quick video tutorial, or you can scroll down to view simple screenshots and written instructions.
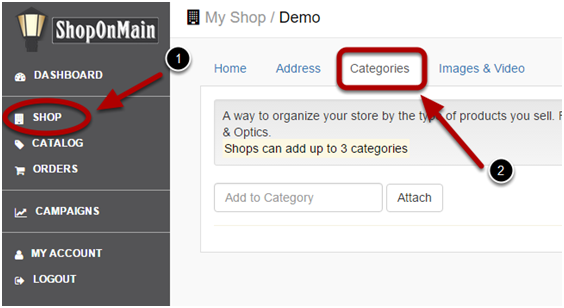
Click on Shop
Once in shop click on Categories.
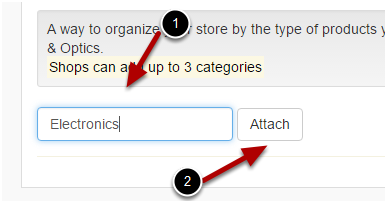
Add a Category
You can add a new category here by typing in a category name. Once you begin typing, the system will pull up a menu of possible options. Once you see the appropriate category, click on it and then select Attach.
Remove a Category
You can remove a category by clicking on the broken link icon to the right of that category.
Let’s quickly go over your catalog. Click on the video play button below for a quick video tutorial, or you can scroll down to view simple screenshots and written instructions.
Your Catalog
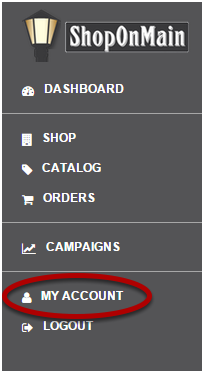
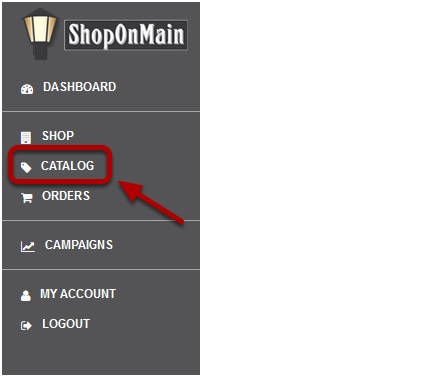
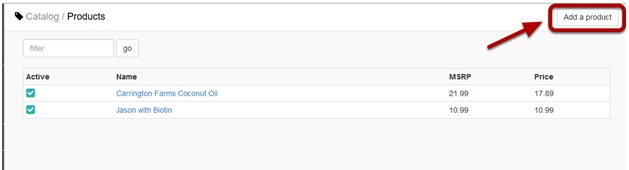
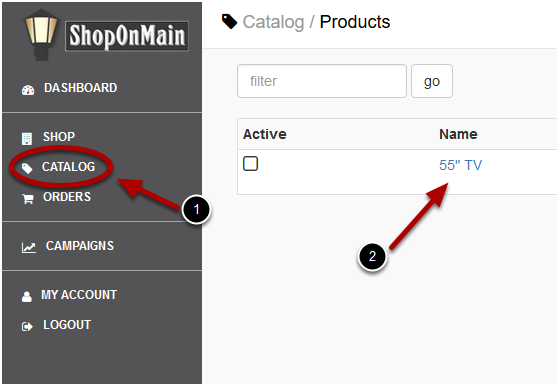
You can get to your catalog at anytime in your account from this menu located on the left hand side. This will take you to the list of products you have added to your ShopOnMain store.
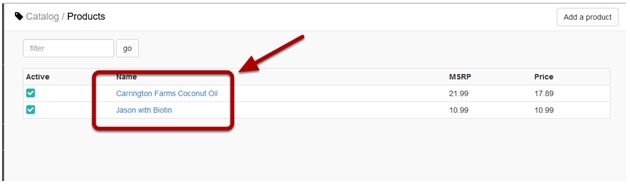
Click on the product name to edit.
Once you’re in your catalog, you can click on any of the products in order to view or edit them. Instructions on how to edit your products can be found here.
This is also where you can add new products.
By clicking on Add a product in the upper right hand corner of this screen, you will be taken to the product wizard which will walk you through adding a new product.
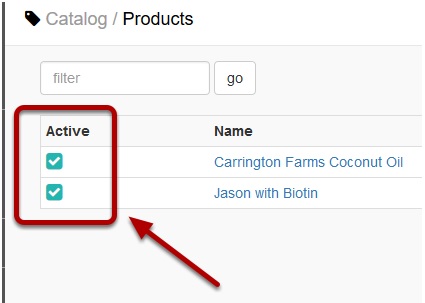
Active or Inactive
Here you will also be able to see which products are active and which ones are inactive. Instructions on how to edit this option can be found here.
These are the steps you will take in order to add a new product to your Shop.
Click on the video play button below for a quick video tutorial, or you can scroll down to view simple screenshots and written instructions.
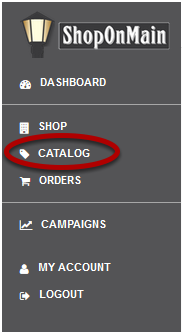
Click on Catalog
Catalog is located in the menu on the left hand side of your account.
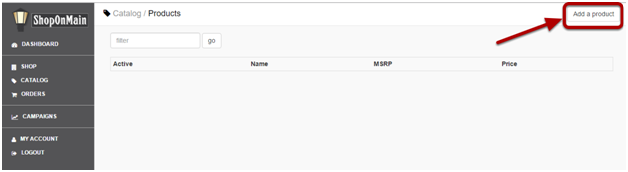
Click on Add a product
Add a Product can be found in the upper right hand corner of Catalog.
The Product Wizard will begin
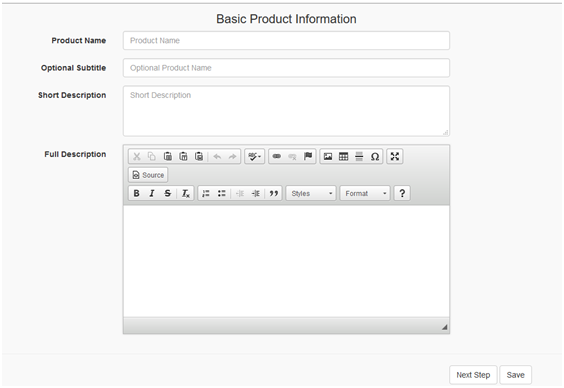
The Wizard is very simple and goes through each step with you, starting with the basic product information. Here you will fill in:
Product Name: this will be the official title for the product you’re selling.
Optional Subtitle: this will be where you can add any other name the product might be known by. As the title suggests, this is optional and not a necessary entry.
Short Description: here you will enter in a brief description of the product. Use main, basic bullet points, information that will stick out to the consumer and make them want to read more about it.
Full Description: here you will go into more detail about your product. Give as much information here as possible so the customer gets a clear idea of what they would be purchasing.
Next Step: after you’ve entered all the appropriate information in, click the button at the bottom right that says Next Step. This will save your progress and take you to the next step in adding your new product.
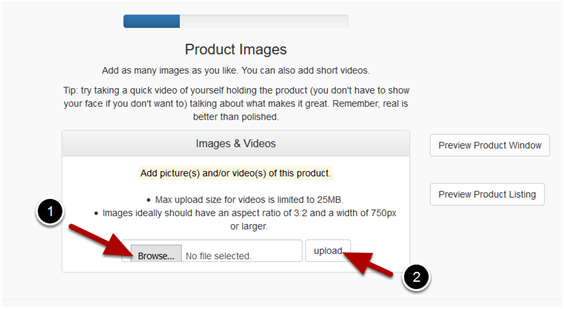
Upload an image or video
Here you will add a photo or video of the product so the shoppers can see what they are purchasing. For more detailed information on the best way to display your product, click HERE.
Browse: after clicking the Browse button, select a picture file from your device that you’ve chosen to use for the image of this product. If you are using a phone or tablet, you can take a picture of the product right then and there to upload.
Upload: after selecting the image or video, click the button that says Upload.
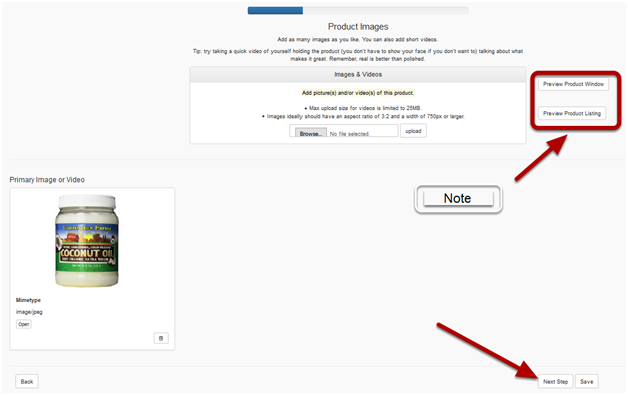
Note: Upload the main image you would like to use for this product. You can go back in to the product later and upload more images if you’d like. Click HERE for the tutorial.
Next Step
After you’ve uploaded your product image(s), click on Next Step at the bottom right of the page.
Note: At this point you can preview your product. Preview Product Window will show you what the product will look like to a browsing shopper. Preview Product Listing will show you how the product and description will display after a shopper has clicked on it.
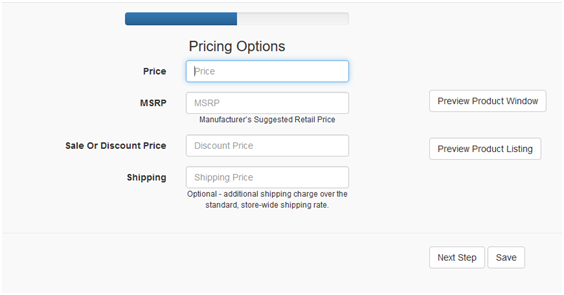
Pricing Options
In this step, you will enter in the cost of the product.
Price: this will be your cost. How much you are selling the item for.
MSRP: this is the Manufacturer’s Suggested Retail Price, basically the price at which the manufacturer recommends that the retailer sell the product. Typically this will be the same as your cost, but can be different.
Sale or Discount Price: if you are currently offering the item at a sale price, you will enter that here. This can be adjusted later. You can find instructions on this by clicking HERE.
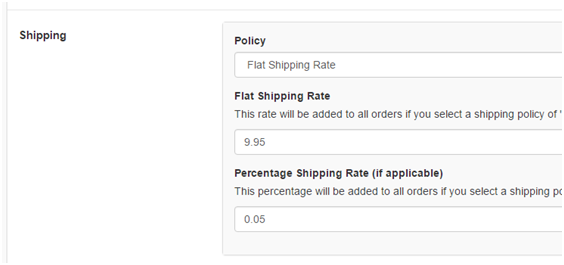
Shipping: every store has a standard flat rate shipping fee. You will only enter a price here if the particular item you are adding will have an additional cost for shipping. This usually only applies to larger items.
Click on Next Step once you’ve finished entering the pricing information.
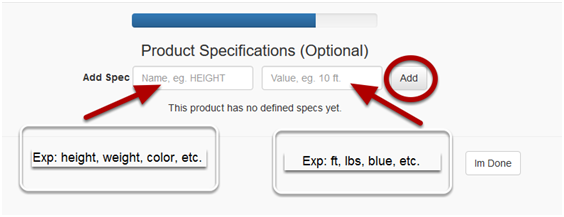
Product Specifications
This step is optional, but recommended if at all applicable. This option is completely flexible, so you can add any type of Spec that you feel necessary.
Begin typing in the name of the spec, if it already exists in the system, a drop down of options will appear. You can click on one of these options, or continue with a custom spec. Next you will enter in the value of the specification you entered. Once done, click the Add button.
This is what an added spec will look like. Once you’re done adding all the appropriate specifications for the product, click on I’m Done at the bottom right corner.
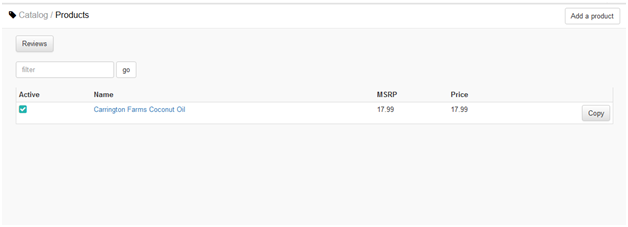
Back to Catalog
After you’ve finished adding your new product, you will be brought back to your Catalog page where you can see the new item in your list of products.
Click on the video play button below for a quick video tutorial, or you can scroll down to view simple screenshots and written instructions.
Click on Catalog and then the product you wish to edit
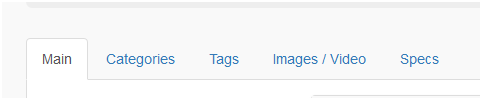
The Main Tab
Here in the Main tab you can:
Change the Visibility. This will activate and deactivate the product from your shop.
Change the product Title.
Adjust the product’s Pricing
Add or remove specific Codes (the SKU and/or UPC)
Edit the product Summary
And edit the product Description
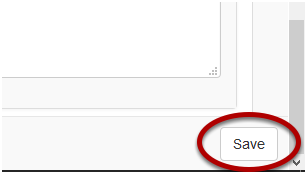
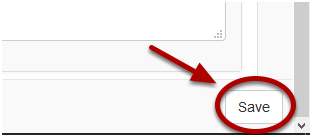
Always Save
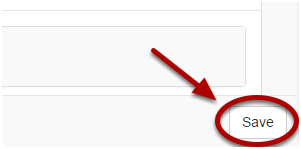
After making any change in the Main product tab, make sure to click the Save button at the very bottom right hand corner of the page.
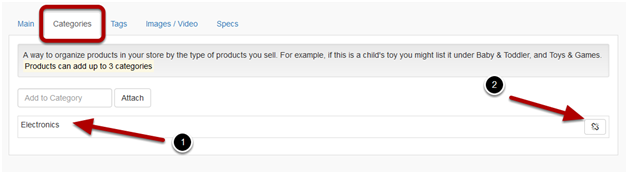
Categories Tab
Here you can add or remove specific categories for the specific product you selected. Simply start typing a category and select the appropriate one from the menu that appears. In this example we have used Electronics. To remove a category, just click on the broken link icon to the right.
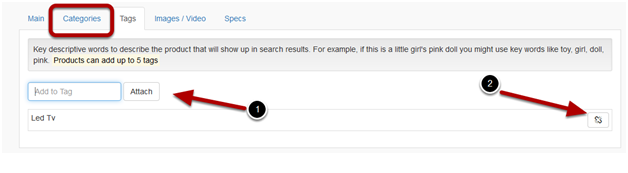
Tabs Tab
Here is where you can add or remove the different Tags you’ve assigned the product. Just begin typing the word you want to use to describe the product, then select from the menu that pops up, or you can just click the Attach button if no appropriate option appears. To remove a tag, click on the broken link icon to the right of the tag.
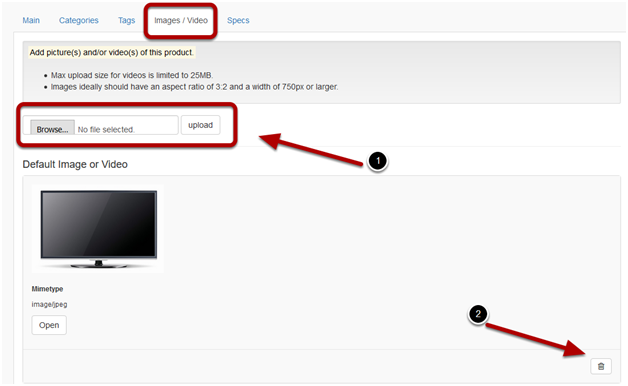
Images and Video Tab
Click on Browse, and select the appropriate image file, then click on Upload. You can delete an image by clicking on the trashcan icon at the bottom left of the image box.
You can upload as many pictures or videos of your product as you wish, though keeping it to a simple few is ideal. Click HERE for some helpful tips on how to best show your product.
Selecting Default Image
The first image you upload, which would have been in the product wizard when you initially added the product, will automatically be your default. Any additional images you add will upload with a star icon. You can make any other image you upload the default picture, or video, by clicking on this star.
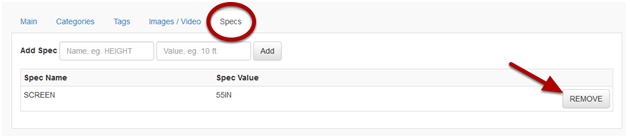
Specs Tab
In the Specs tabs you can add, or remove, any specifications appropriate to the product. Examples would be: height, weight, color, size, etc.
You can remove them by simply clicking the REMOVE button.
You can never truly delete a product from your account. However, you can deactivate it. This will make it unavailable for viewing or purchase. Click on the video play button below for a quick video tutorial, or you can scroll down to view simple screenshots and written instructions.
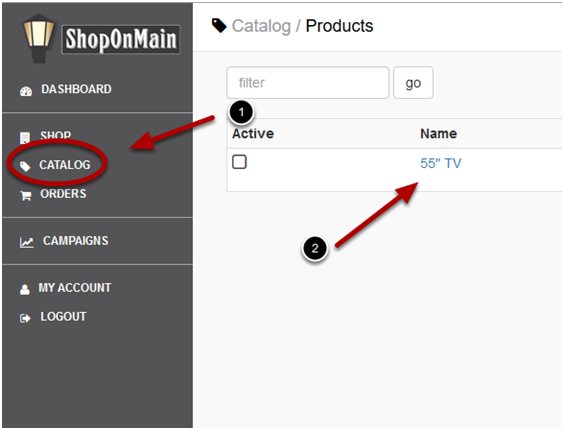
Click on Catalog
Then select the product you wish to deactivate or reactivate.
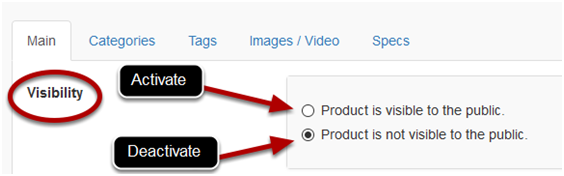
Main Tab
The first option in the Main tab is Visibility.
Click on the circle next to Product is not visible to the public to deactive it.
Click on Product is visible to the public to reactivate it.
Save It
Always remember to click on Save at the bottom right corner of the Main tab page.